Horaizon Orthopedic Implants Horaizon Orthopedic Implants

Top Orthopedic Implant Sterilization Tips Before Delivery?

Time:2026-09-23 Author:Henry
0%

Before an orthopedic implant reaches the operating room, sterilization must be treated as a controlled release decision, not a final packaging task. The process covers cleaning, bioburden reduction, validated sterilization, drying, packaging, storage, and shipment. Small failures matter. A wet tray can compromise packaging. A damaged seal can invalidate confidence.

The World Health Organization reports that surgical site infections affect up to one-third of surgical patients in some low- and middle-income settings. Its Global Guidelines for the Prevention of Surgical Site Infection also identify sterile processing as a major prevention measure. For implant manufacturers and healthcare suppliers, ISO 17665, ISO 11135, ISO 11137, and AAMI ST79 provide practical frameworks for steam, ethylene oxide, radiation, and facility sterilization controls. These standards should guide validation, monitoring, traceability, and release documentation.

So, How to ensure orthopedic implants are properly sterilized before delivery? Confirm the approved sterilization method matches the implant material, design, and packaging. Review biological indicators, chemical indicators, cycle records, load configuration, and residual testing where applicable. Inspect every pouch, tray, and container before dispatch. Record lot numbers and maintain a complete chain of custody.

William A. Rutala, PhD, MPH, a recognized infection-prevention specialist, states, “Sterilization describes a process that destroys or eliminates all forms of microbial life.” This principle remains simple, but execution is not. A checklist alone cannot replace validated equipment, trained personnel, and independent review. No process is perfect. Human handling, transport vibration, and rushed release decisions still require honest reassessment before delivery.
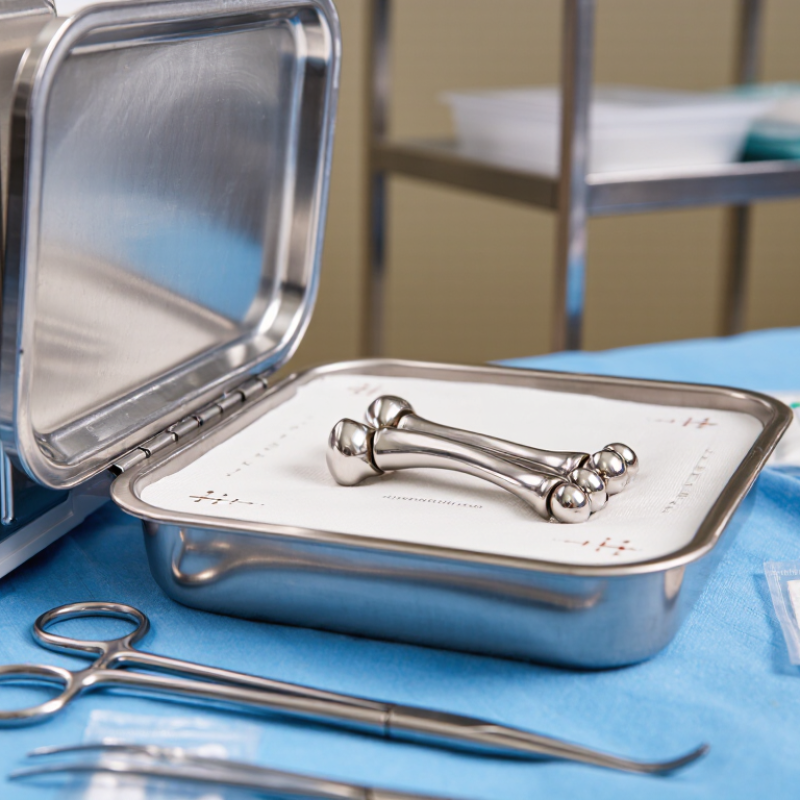
Top Orthopedic Implant Sterilization Tips Before Delivery?

Define Sterility Requirements for Each Orthopedic Implant

Top Orthopedic Implant Sterilization Tips Before Delivery

Every orthopedic implant needs a defined sterility requirement before delivery. Do not treat plates, screws, and joint components as one category. Their materials, geometry, packaging, and intended tissue contact can change the sterilization strategy.

A porous implant may trap residues or moisture. A polymer component may deform under excessive heat.

The product specification should state the required sterility assurance level, validated cycle, packaging limits, and release criteria. Document it clearly.

The team should review bioburden data, material compatibility, and package integrity together. Steam may suit heat-resistant metal devices, while low-temperature methods may protect sensitive components.

Each process needs documented validation, routine monitoring, and qualified personnel. Check chemical or biological indicators according to the approved procedure. Measure residual sterilant when applicable.

Inspect seals, labels, and protective barriers before shipment. A damaged pouch is not a minor detail.

Traceability must connect every implant to its sterilization load, operator records, test results, and expiration date.

Storage conditions also matter. Heat, humidity, and rough handling can weaken packaging after sterilization.

A checklist helps, but it can still miss an unusual design change. I would recheck the requirements after any material, supplier, or packaging revision.

That extra review may feel repetitive. It is often where hidden risk becomes visible.

Inspect, Clean, and Prepare Implants Before Sterilization

Before orthopedic implants enter sterilization, inspection and preparation deserve careful attention. A clean load begins with a clean implant. Experienced teams examine every surface under bright, focused light. They check for scratches, corrosion, residue, damaged threads, and missing components. Small defects can become serious concerns later.

Cleaning should follow the device manufacturer’s validated instructions and the facility’s approved procedures. Remove visible soil with compatible tools, paying close attention to grooves, channels, and joint interfaces. Use suitable water quality and cleaning agents. Rinse thoroughly, then dry every surface completely. Trapped moisture can interfere with sterilization and may damage packaging. Do not guess.

Tips:

Use a magnifier for fine threads. Record unusual findings. Keep rejected items separate. Never force a component into place.

Preparation continues after cleaning. Confirm the implant’s identification, quantity, and configuration against the surgical request. Inspect packaging for punctures, weak seals, or moisture. Arrange items so sterilant can contact exposed surfaces, while avoiding overloaded trays. Heavy instruments should not press against delicate implants. A second trained person should review the setup when possible.

One practical lesson is easy to miss: rushed preparation creates hidden errors. A tray may look orderly but still contain residue beneath a connector. That is why visual checks should be deliberate, documented, and repeatable. Sterilization parameters must match validated instructions, facility policy, and applicable regulations. When uncertainty remains, pause the process and consult qualified sterile-processing or clinical personnel.

Select and Validate the Appropriate Sterilization Method

Choosing a sterilization method for orthopedic implants requires more than selecting a familiar cycle. The method must match the implant’s material, geometry, surface finish, and packaging system. A porous coating, narrow channel, or complex joint may block heat, moisture, or sterilant contact. Small details matter.

Steam sterilization suits compatible, heat-resistant devices and requires validated exposure, temperature, pressure, and drying controls. Ethylene oxide may serve temperature-sensitive components, but residual limits, aeration time, and workplace controls need careful verification. Radiation can affect polymers and packaging, so dose mapping and material testing remain essential. Use current, recognized standards and applicable regulatory requirements for each method.

Validation should represent the hardest delivery condition, not an ideal laboratory load. Test worst-case placement, maximum weight, tight packaging, and the longest expected transport period. Biological indicators, chemical indicators, physical records, and package integrity checks provide different evidence. No single result proves sterility. In practice, teams sometimes underestimate drying or overtrust a passing indicator. That deserves correction.

Document the equipment qualification, cycle parameters, load configuration, and acceptance criteria. Repeat validation after design, packaging, or process changes. Before shipment, inspect seals, labels, and protective barriers under controlled lighting. A clean implant is not automatically a sterile implant. Reliable delivery depends on validated processing, trained personnel, and records that another qualified reviewer can understand.

Top Orthopedic Implant Sterilization Tips Before Delivery

Select the sterilization method according to implant materials, packaging, device geometry, and validated process capability. The chart shows representative operating-temperature windows commonly used for selected medical-device sterilization methods.

These temperature ranges are representative process windows, not release specifications. Before delivery, confirm method suitability, establish a documented validated cycle, verify packaging integrity, review biological and chemical indicator results, and confirm applicable residual limits. Steam, ethylene oxide, and vaporized hydrogen peroxide processes should be validated under the relevant ISO requirements.

Package and Label Sterile Implants for Safe Delivery

Top Orthopedic Implant Sterilization Tips Before Delivery?

Package and label sterile implants for safe delivery. Packaging is not decoration; it is the final protective barrier. ISO 11607-1:2019 requires packaging systems to maintain sterility until the point of use. Inspect every pouch, tray, and seal for punctures, wrinkles, moisture, or weak edges. A small tear can turn a controlled process into a clinical risk.

WHO’s Global Guidelines for the Prevention of Surgical Site Infection report that about 11% of surgical patients in low- and middle-income countries develop surgical site infections. That figure makes traceability essential. Each package should show the implant description, size, lot or serial number, sterilization method, cycle identification, and expiration information when applicable. Use ISO 15223-1 symbols correctly, and keep critical text readable after transport. Labels should remain attached in cold, humid, and dusty conditions. They sometimes do not.

Use tamper-evident closures and secondary protection for heavy metal implants. Separate sharp edges from sterile barriers with approved guards. Record the final inspection, release decision, and handler identity. AAMI ST79 emphasizes documented sterilization quality systems, but documentation cannot repair poor packaging. Before dispatch, compare the physical implant with the packing list and electronic record. One missed character can delay surgery. Recheck it manually. Mistakes still happen.

Top Orthopedic Implant Sterilization Tips Before Delivery? - Package and Label Sterile Implants for Safe Delivery

Control Area Recommended Practice Before Delivery Verification Evidence Key Safety Consideration
Device Eligibility Confirm that the implant is approved for the intended sterilization process and that the processing instructions are current. Validated processing instructions, device specifications, and batch documentation. Do not reprocess a device unless the manufacturer’s validated instructions expressly permit it.
Pre-Sterilization Inspection Inspect the implant for visible soil, corrosion, surface damage, burrs, deformation, or compromised components. Documented inspection checklist and acceptance or rejection record. Damaged or contaminated implants should be quarantined and investigated before release.
Cleaning and Preparation Remove processing residues and contaminants using the validated cleaning method. Allow the implant to dry completely before packaging. Cleaning-cycle record, equipment parameters, and visual inspection result. Moisture or residue inside the package can compromise sterile-barrier performance and product quality.
Sterilization Method Use only a validated sterilization cycle suitable for the implant material, geometry, packaging system, and intended use. Cycle printout or electronic record showing critical parameters such as time, temperature, pressure, or exposure conditions. Common methods include moist heat, ethylene oxide, radiation, or other validated processes; suitability depends on the device and packaging.
Packaging System Use packaging that is compatible with the sterilization process and provides a validated sterile barrier and protective outer layer. Packaging specification, seal-integrity result, and approved packaging configuration. Avoid overloading, sharp edges, excessive weight, or configurations that may puncture or stress the sterile barrier.
Package Seal Inspection Check seals, closures, pouches, trays, and protective coverings for uniformity, tears, punctures, open edges, and deformation. Recorded visual inspection and, where applicable, validated seal-strength or integrity testing. Any package with a broken, wet, torn, or questionable sterile barrier must not be released as sterile.
Sterilization Indicators Apply the appropriate external indicator and use internal chemical indicators when required by the validated process or facility procedure. Indicator result reviewed and linked to the sterilization load record. Chemical indicators support process monitoring but do not, by themselves, prove sterility.
Biological Monitoring Use biological indicators according to the facility’s validated sterilization program and applicable regulatory requirements. Negative biological-indicator result and documented review by authorized personnel. A failed biological-indicator result requires load investigation and prevents routine release until resolved.
Labeling and Traceability Label the package with device description, size or configuration, sterilization status, lot or serial number, sterilization date or expiration information when applicable, and handling instructions. Label reconciliation against the production and sterilization records. Labels must remain legible, securely attached, and consistent with the approved device and packaging records.
Release Authorization Release the implant only after review of sterilization records, indicator results, packaging inspection, labeling, and any required test results. Signed or electronically approved batch-release record. Unreviewed, incomplete, or discrepant records require quarantine until the issue is assessed.
Storage Before Shipment Store packages in a clean, dry, controlled area away from sunlight, water, dust, chemicals, pests, and excessive compression. Storage-area inspection and environmental monitoring records, where required. Sterility is event-related; package damage or adverse storage conditions may compromise the sterile barrier before the stated date.
Shipping Protection Use clean secondary packaging with cushioning and immobilization to prevent impact, vibration, abrasion, crushing, and moisture exposure during transport. Shipment inspection, packing checklist, and dispatch record. Do not ship packages that show crushing, punctures, broken seals, water exposure, or other evidence of damage.
Receipt and Final Check Advise the recipient to verify package integrity, label accuracy, quantity, and traceability information before accepting the delivery. Goods-receipt inspection and discrepancy report, if needed. Any questionable package should be segregated and assessed before clinical use.

Note: Sterilization, packaging, labeling, storage, and release activities must follow the device-specific validated instructions, the quality system, and applicable regulatory requirements.

Verify Sterility, Storage Conditions, and Shipment Records

Top Orthopedic Implant Sterilization Tips Before Delivery

Verify sterility before an orthopedic implant leaves the processing area. Surgical site infections represent about 20% of healthcare-associated infections, according to the CDC. That risk makes every seal, indicator, and record important.

Review the sterilization cycle number, load contents, operator, exposure time, temperature, and biological indicator results. AAMI ST79 recommends documenting sterilization monitoring and load release decisions. Check the package for wet spots, tears, punctures, broken seals, or crushed corners. A sterile barrier is not reliable when visibly damaged. The implant should remain in approved packaging, away from sunlight, moisture, dust, and extreme temperature changes. Storage shelves should be clean and elevated from the floor. Small details matter.

Tips: Match the implant’s lot number with the sterilization record and shipment manifest. Confirm that chemical indicators changed as expected. Quarantine unclear items. Do not rely on appearance alone. Before delivery, record the dispatch time, courier, destination, package condition, and temperature requirements. Compare the receiving facility’s acceptance criteria with the shipment documents. The FDA emphasizes traceability and complaint documentation for medical devices, yet paperwork gaps still occur. Human error is possible. A second-person review helps, although it is not a substitute for validated processes. If a record is incomplete, pause release and investigate the missing evidence.

FAQS

What should be checked before an implant enters sterilization?

Inspect every surface under bright, focused light. Look for scratches, corrosion, residue, damaged threads, and missing parts. Small defects matter.

How should visible soil be removed?

Follow validated instructions and approved facility procedures. Use compatible tools around grooves, channels, and joint interfaces. Do not guess.

Why must implants be completely dry?

Trapped moisture can interfere with sterilization and damage packaging. Dry hidden areas carefully, including connectors and narrow channels. Moisture is easy to miss.

How can fine threads be inspected?

Use a magnifier and strong lighting. Record unusual findings clearly. Keep rejected items separate, and never force parts together.

What should be confirmed after cleaning?

Check the implant description, quantity, size, and configuration against the surgical request. A second trained person should review the setup when possible.

How should implants be arranged in a sterilization tray?

Leave exposed surfaces accessible to the sterilant. Avoid overloaded trays. Heavy instruments should not press against delicate implants.

What packaging problems require attention before delivery?

Inspect pouches, trays, and seals for punctures, wrinkles, moisture, and weak edges. A small tear can compromise the sterile barrier.

What information should appear on each package?

Include the implant description, size, lot or serial number, sterilization method, cycle identification, and expiration information when applicable. Keep labels readable.

How can packaging protect heavy or sharp implants?

Use tamper-evident closures and approved secondary protection. Cover sharp edges before they contact sterile barriers. Metal can damage thin packaging.

What should happen when records or labels do not match?

Pause release and compare the physical implant with the packing list and electronic record. Recheck every character manually. Mistakes still happen.

Conclusion

How to ensure orthopedic implants are properly sterilized before delivery begins with clearly defined sterility requirements for each implant type, including material compatibility, intended use, and required sterility assurance levels. Before processing, every implant should be inspected for damage, cleaned to remove residues, and prepared according to controlled procedures. The selected sterilization method must be suitable for the device and supported by documented validation, routine monitoring, and appropriate quality checks.

After sterilization, implants should be placed in protective packaging that maintains sterility during handling and transport. Each package should be accurately labeled with essential details such as identification, processing status, expiration information, and handling instructions. Final release should include a review of sterilization indicators, storage conditions, environmental controls, and shipment records. Maintaining complete traceability from preparation through delivery helps protect implant quality, supports regulatory compliance, and ensures that only properly processed products reach the intended healthcare facility.

Henry

Henry

Henry is a dedicated marketing professional with a profound expertise in the company's offerings. With years of experience in the industry, he possesses an impressive understanding of the market dynamics and consumer behaviors that drive success. Henry is committed to sharing his insights through......